

This tutorial will be covering the step-by-step guide to create a card tracking app using XCode. In this example, we will create an application, in that when the camera will track a pre-defined card it will play a video on that card.
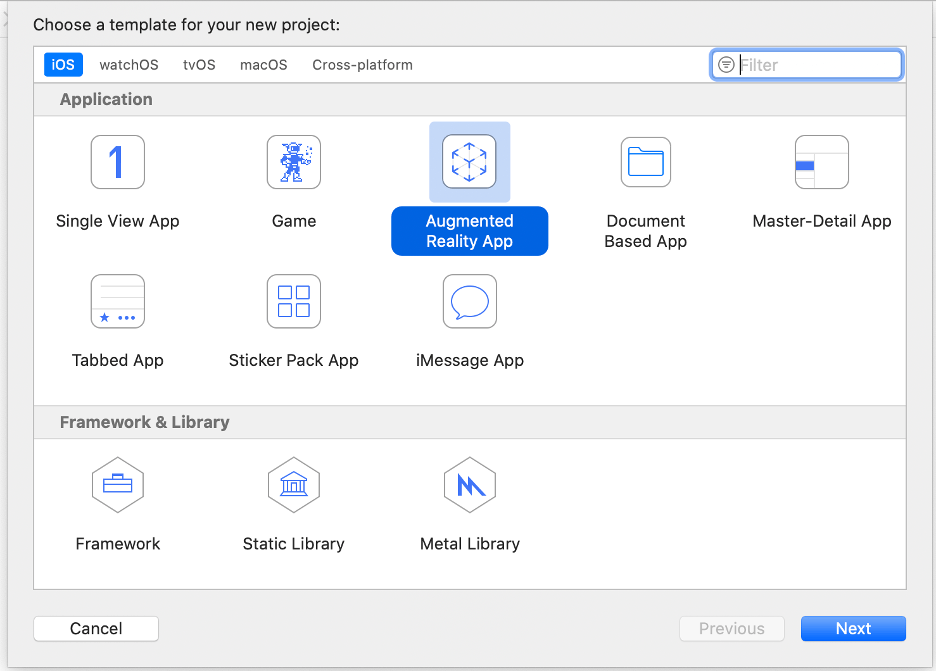
First, open XCode and create a project. Make sure to choose Augmented Reality App from the templates.
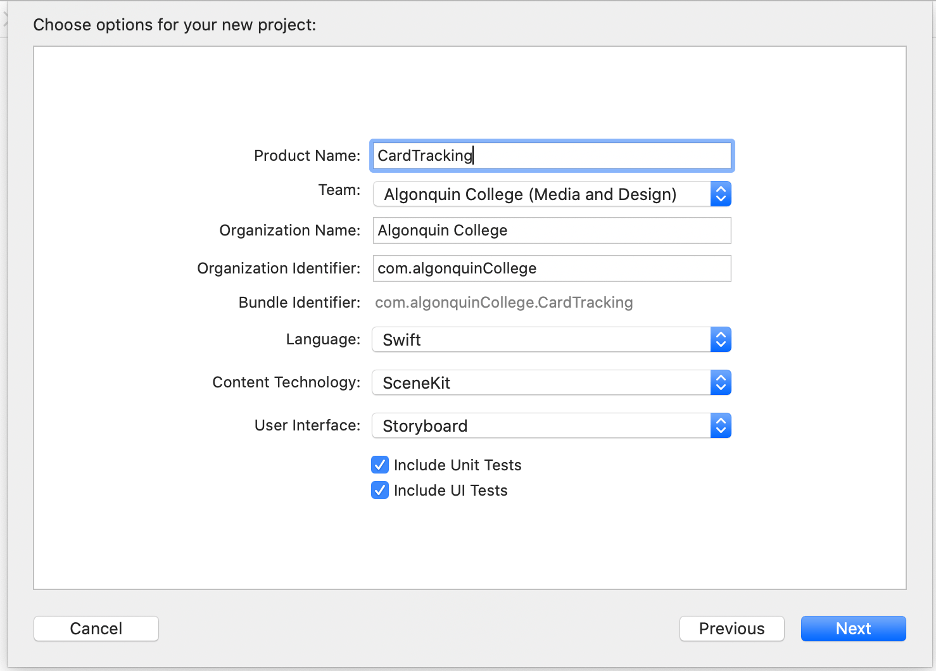
Now we have a base project ready, let’s start editing it.
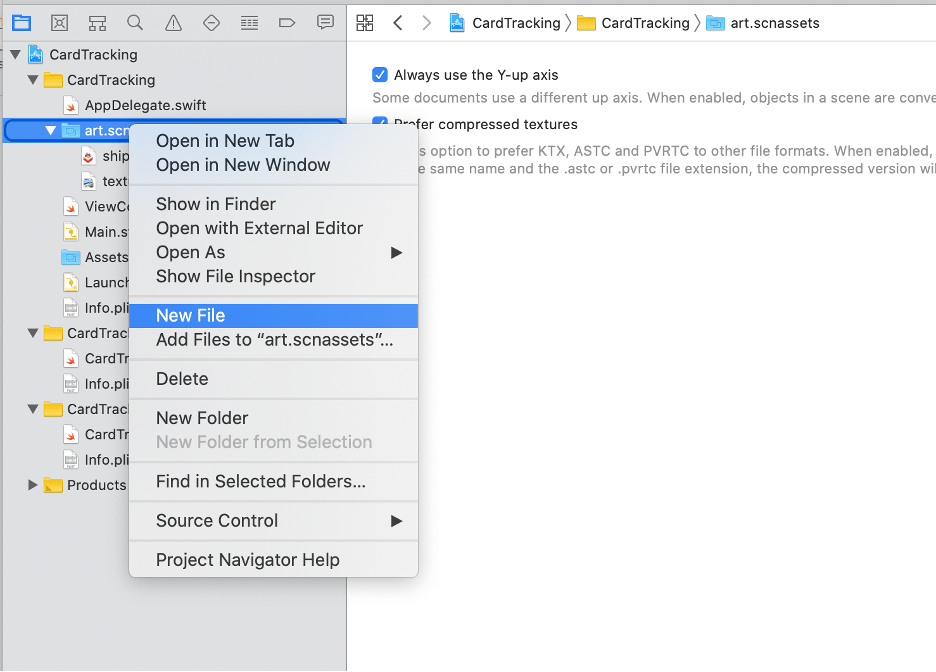
The first step will be adding a custom .scn file to our project. To do so right-click on art.scnassets folder and select a new file.
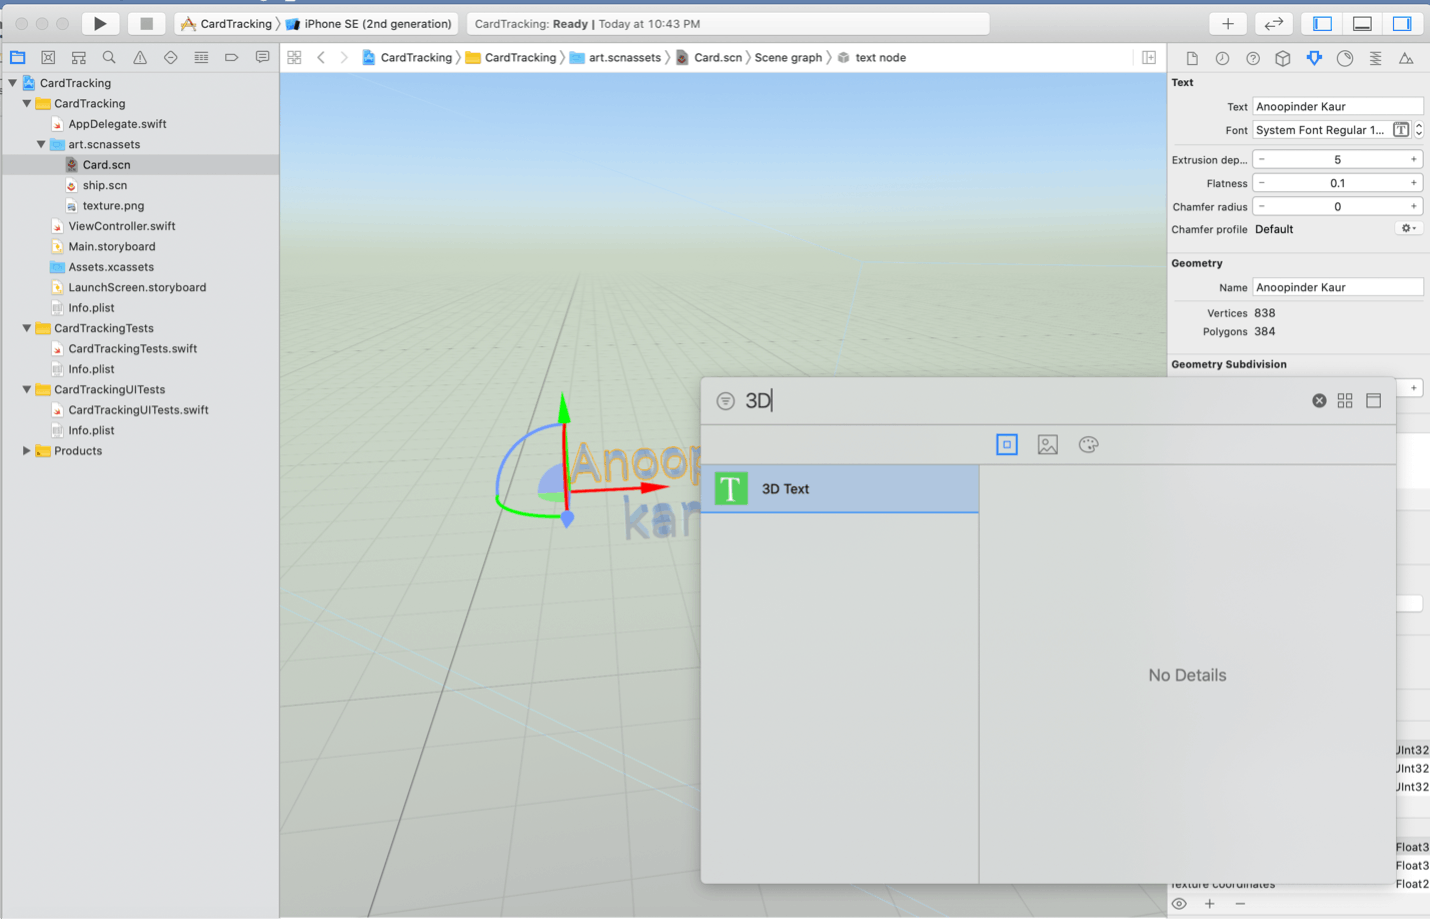
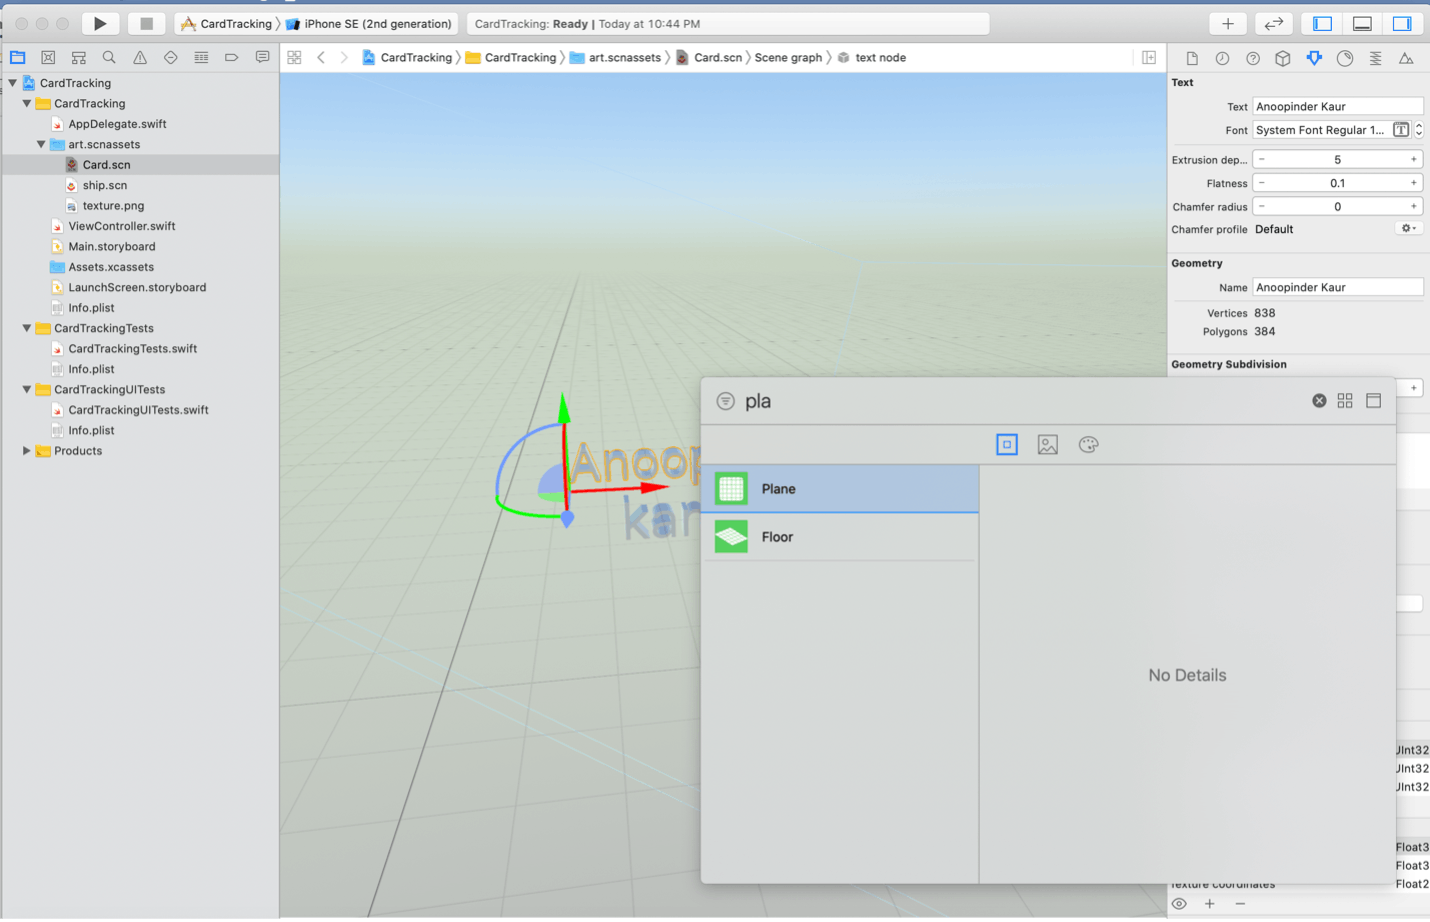
Here I will create my custom card to display video with my name and website.
Click on + on the top right to add a 3D text Object. One for the name and one for the website.
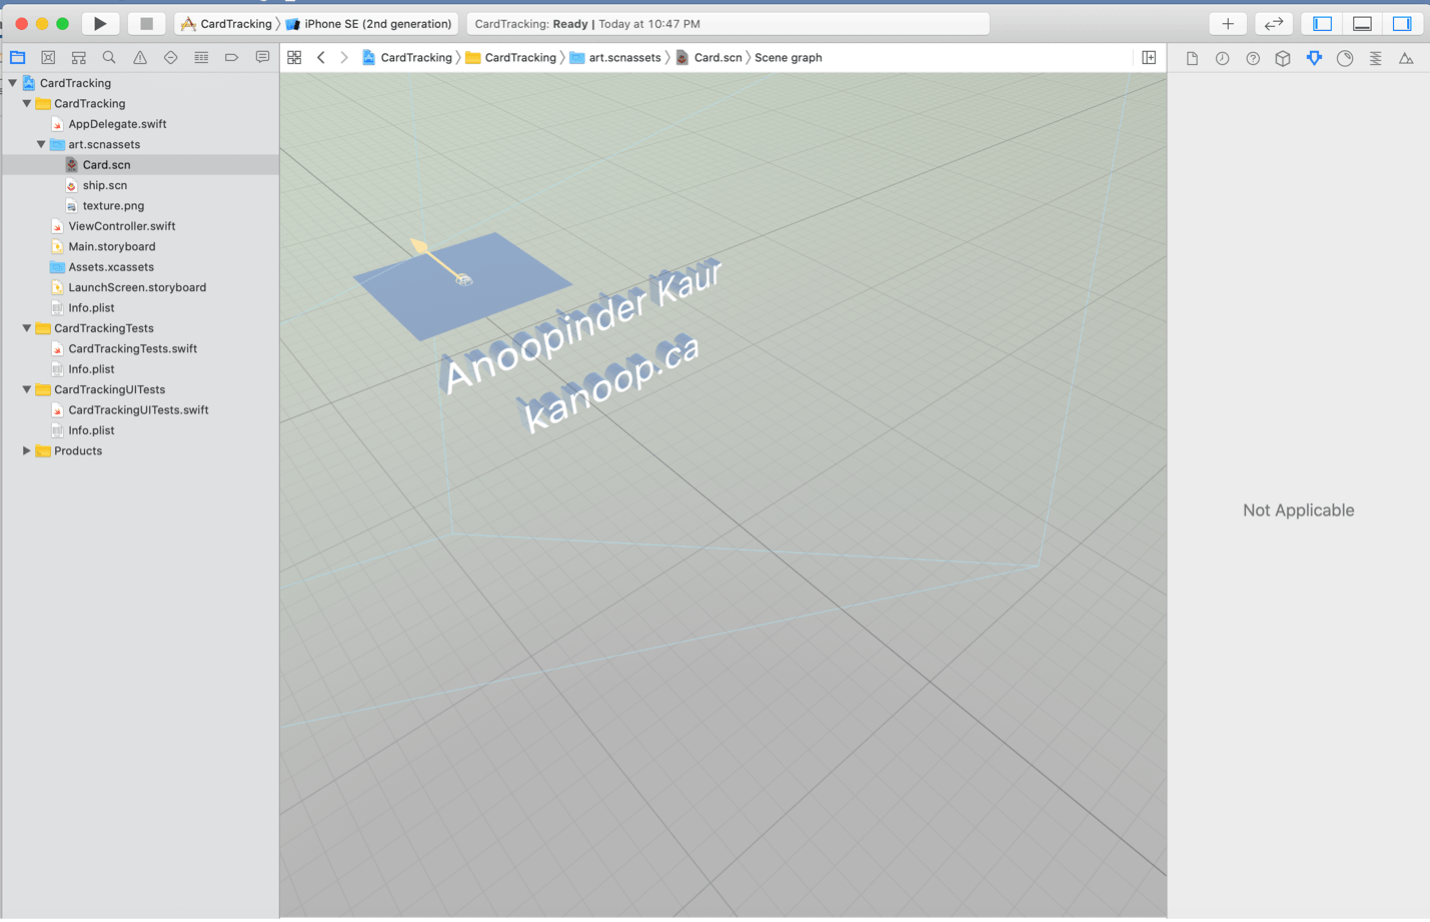
Next, Add a plane to display a card shape to play video.
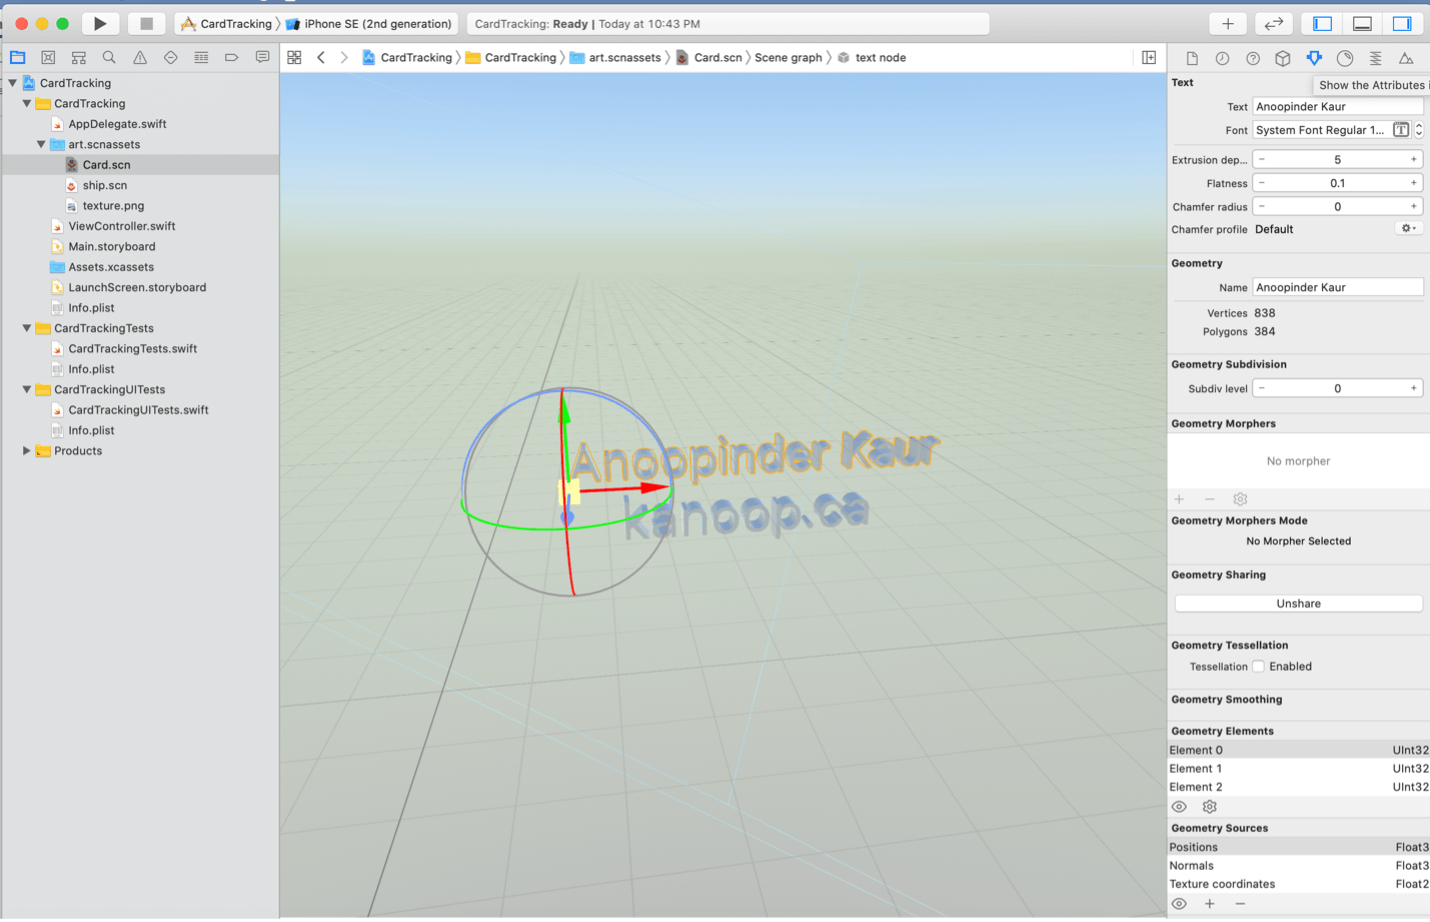
Here I used, ambient light and directional light just for the visual.
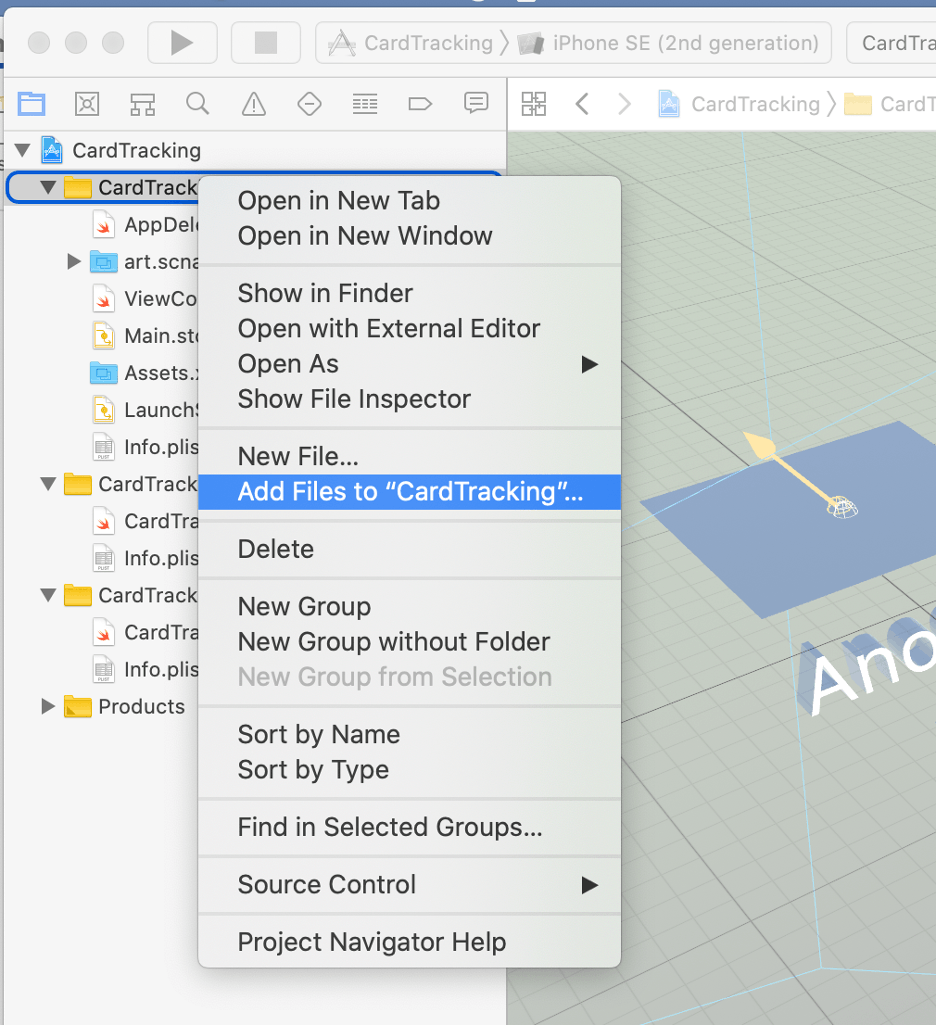
Now, let's add the video we want to play over the card. To do that download any mp4 you want to play and add it to the project by right-clicking on the project name folder and selecting add file to ‘project name’.
Now add the image of the card you want to use to display the video in the assets.xcessets folder.
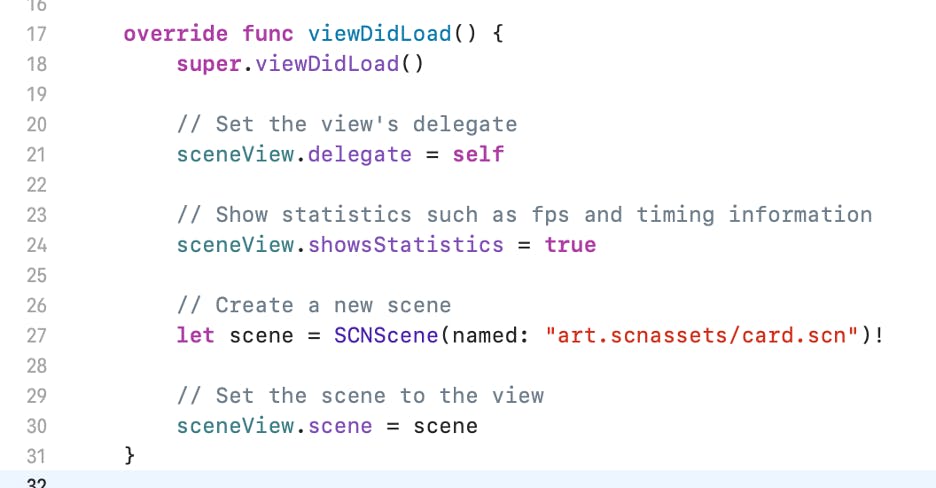
Alright, all setup let's start coding. The viewDidLoad function provides the right path to the card.
Now in the viewWillAppear function update the code as shown below.

I have set the configuration to ARImageTrackingConfiguration() it’s a part of the AR library. This will grab all the images from the AR Resources under Assets.xcassets.
Next, create a renderer function as shown below: -
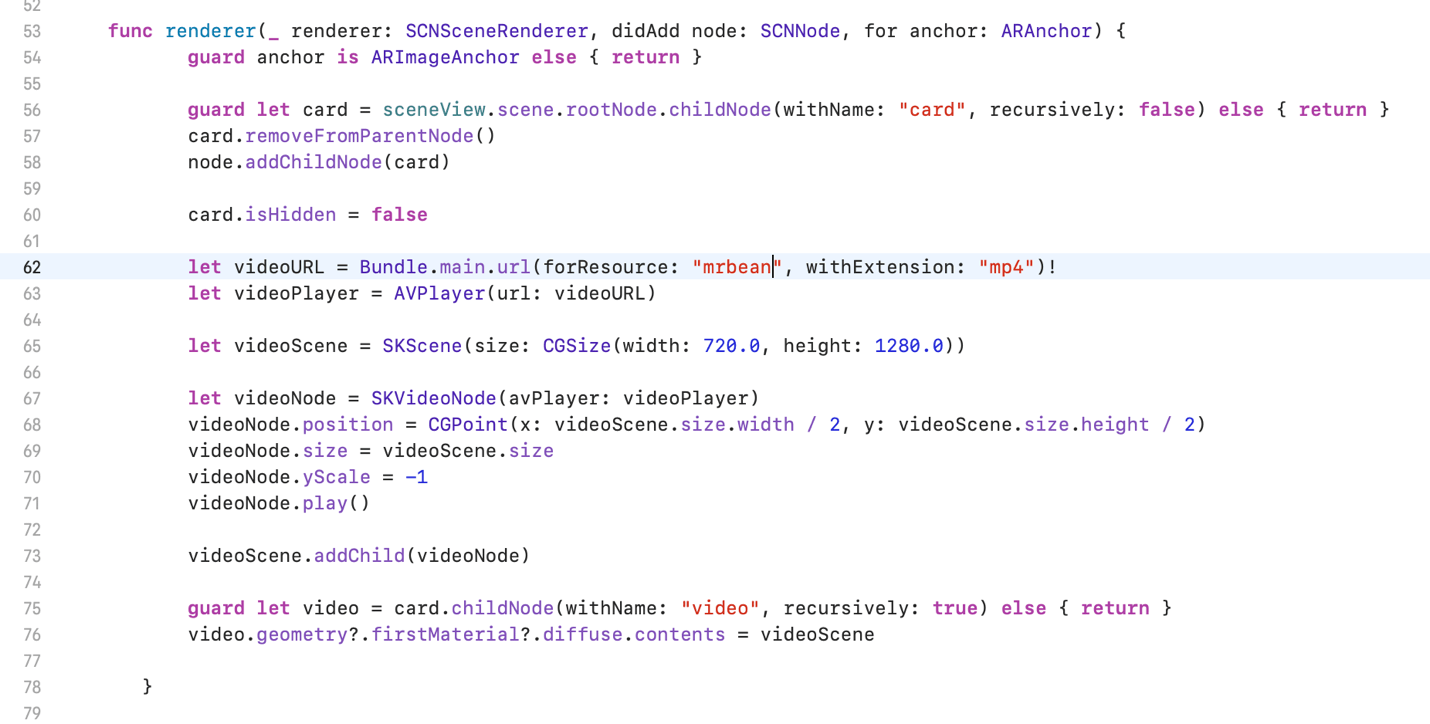
In this function, we will first cast the found anchor as an image anchor. If there is an image then it will grab the first child node in sceneView and remove it from the scene and make the card visible.
The next step will be linking the video to scene. Make sure to use the correct name of your file name and the right extension.
Once this is done then we need to set the height and width of the video player screen (width: 720.0, height: 1280.0).
Now set the position, size, and scale of the videoNode and call the play function.
Play function is making the content appear on our custom card.
That’s it, Save it and run it on your device.
Try to add different images and show different videos for each of them.
Best of Luck!